

How to Create & Manage your Profile
- AFG Secretariat

- Feb 3, 2021
- 4 min read
Updated: Feb 8, 2022

Make sure you are logged in:

Click on your name written in blue, it is under the Public Resources menu item. In the small dropdown that appears click 'Profile'.
To access the 'Member Area' click on the link beneath 'Profile' in the same dropdown menu.

The 'Member Area' can also be accessed by a menu item in the Profile horizontal menu pictured below:


To assign your profile picture place an image in the circle within the blue banner, click on the circle, then browse and choose your preferred photo:

To edit your name in the blue banner, navigate to the 3 vertical dots on the right of the blue banner. Click on these to reveal 'Edit Profile' and make your changes, then click save. Any changes you make to your name will carry over to the publicly visible profile name once you have made your profile public (explained below).
Managing your Profile
Your Profile has 6 tabs that give access to different information. The first 2 are on a horizontal menu as below: 'CPD Entry' & 'Member Area'.

The remaining 4 appear in a dropdown menu when you hover over Profile as below:

PROFILE 'ABOUT'

This section is the only aspect of your Profile that will be visible to the public. This section is where you can place text, images, an image gallery and even video content to create an impression of who you are and what you do.

NOTE: Your 'Profile About' is accessible to website visitors via your 'Practice' page from which there is s direct link (pictured right). For more information on setting up your 'Practice' see the 'Add/Modify/Delete a Practice' How To.
To enter text in the 'About' field, use your cursor to click below the slim white line and begin writing. The first time you do this you will overwrite "Share something about yourself..."

The text you enter here will be visible on the website once you 'Make your Profile public' as explained below.
You can edit this field by clicking your cursor on the field and beginning to type.

Single images, image gallery and videos can be added by clicking on the camera icons under the field.

Once you have uploaded your image content you have various adjustment options. Simply click on the image to reveal the adjustment menu. Explore options such as size, alignment, URL link and settings.

NOTE: Once you have entered text or image content, and any time you make adjustments or edit you much complete the process by clicking 'Publish'. If you do not do this you will lose your work.
Special note on MAKING PROFILE PUBLIC

This step is very important if you want your ABOUT info to be visible to prospective clients, the practitioner community and visitors to the site. Additionally you will not be able to create ATM Classes or submit workshops unless you have made your profile public. Simply click the 'Make Profile public' button and it will appear in the search functionality of the site.
Access to the RESOURCES area is contingent on 'making profile public'. This is due to the architecture at the back end of the site. We have devised a work around for those of you who would like to remain 'private' yet who are active members of the Guild who need and want full access to AFG Resources.

When editing your Profile (as explained here) change your name to: 'Non-Practicing Member' or 'Private Member' as you see fit.
Please download the 'Non-Practicing Member' image here. Or 'right click' on the image to the right and download it to your computer. Save it. In your Profile upload the saved image as your Profile Picture. As explained here.
Finally delete any text from your 'About' section as this will be visible to other members and the general public.
You are now ready to 'Make Profile Public' but remain anonymous in so doing. Once your profile is public you can freely access the Resources. Select 'Make Profile Public'. This dialog window will appear:

Select Confirm and you're done.
Please note: you are free to make your profile 'private' again at any time.. To do so click on the 3 dots to the right of your name. Select Make Profile Private. Click Confirm.
CPD ENTRY

Continuing Professional Development. As per Certification requirements you can include all accepted activities here. Detailed explanation of this is included in the CPD Entry section.
MEMBER AREA
The 'Member Area' gives you access to the Member only section of the site from which is the engine room of functionality for AFG Members. From here you access Member only 'Resources', Submit a 'Workshop Request', 'Add/Modify/Delete a Practice', 'Add/Modify a Class', access the 'AFG online Shop', 'How to Guides' and use the 'Contact Us' form if you have questions or run into any problems. Below is a peak inside the Member Area itself.

MY SUBSCRIPTIONS

Clicking on this tab will bring up a page showing your AFG membership type and whether it is active.

MY ADDRESS

This is your profile address for administering your account. This address is not visible to the public. It is not your Practice address. Practice address is explained in the Member Area 'How to'.
MY ACCOUNT

Your user account information. This is where you can change your Profile display name:

You can see the email address under which you registered your account. This address cannot be changed.


Your community page URL address is included here should you wish to copy and paste it elsewhere. This is the actual web address of your 'Public Profile'.

Your user name is provided and is editable. This will not change the name that appears in your Profile.
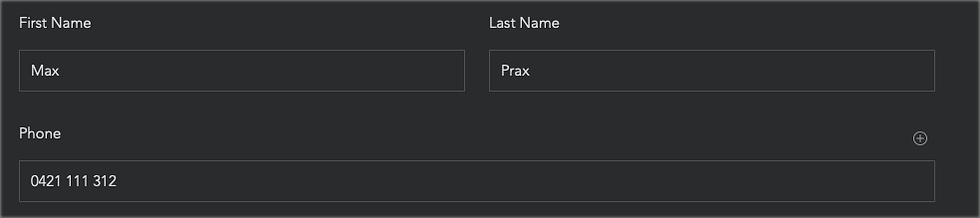
Phone number is the number associated with your account, not your Practice.

Don't forget to click on 'Update' to save any changes you make to the Account section.
NOTIFICATIONS

This section facilitates communication from site administrator, yourself and the AFG member community.
This concludes 'How to create and manage your user profile'.
Comments